.png)
HCImage supports motorized microscopes from Olympus, Leica, Zeiss and Nikon as well as the Hamamatsu AEQUORIA Dark Box. All of the microscopes must be configured using the manufacturer's drivers before being added to a profile. Some of the microscopes require additional files before being controlled by HCImage.
Microscope components are the various controllable devices that make up the microscope. The components are grouped by function and updated depending on the selected microscope. Multiple devices can be installed and used in conjunction, allowing simultaneous control of excitation and emission wavelengths.
Use the Following steps to add a Microscope Device to a Profile and test it:
Use this menu to select the Manufacturer and type of the microscope to add. All of the connected microscope components are indicated with a check mark. Click the option box to add or remove any of the components. After choosing the correct major microscope type from the list-box, check off the microscope components which are included in your system.
.png)
As the various microscope components are checked and un-checked to indicate which components are present, the Filter Setup, Stage Setup, and Shutter Setup tabs should disappear whenever they have become irrelevant (i.e., the Stage Setup tab would not be visible if Z-focus was not checked). Specifying the wrong controller type may cause problems when sending commands that are not correctly supported. In such a case the controller and possibly the host computer system may need to be powered off and reset. For convenience, more than one device can be added at the same time. Check all items that are to be computer controlled, and the devices will appear in the Filter, Shutter and XYZ Stage control device lists.
.png)
Select the COM port for RS-232 communications. The Baud rate and other communications parameters must be correctly set to achieve proper control. Check the manufacturer’s documentation and specifications first. The default values are likely to be correct, but may not be in all cases.
.png)
Using the button next to the "COM Port" buttons group label will scan for available COM-Ports.
Note: In some cases, the COM port may be shared with another device (filter, shutter, stage, etc.) that uses the same controller or may be in use by a different device.
The Filter Setup page allows the physically installed filters to be configured for software control. There may be one or more filter devices listed in this display. Each filter device can be configured with an interface such as that discussed under Filter Device Controller Properties.
.png)
Note: If the microscope being configured does not have filters to control or if none of these filters were checked on its controller selection tab, the Filter Setup tab is not visible.
Refer to the Microscope Control Manual for details on the operation and compatibility of available wavelength-control devices for specific microscopes.
The Shutter Setup page allows the physically installed shutter actuators to be configured for software control. There may be one or more shutter device sub-pages shown on this tab-page, where shutter device can be configured according to the same type of interface discussed under Shutter Device Controller Properties.
.png)
Note: If the microscope you are using does not have any shutters to control, or if none of these options were checked on the Controller selection tab, the Shutter Setup tab should not be visible.
Refer to the Microscope Control Manual for details on the operation and compatibility of available integrated stage-control devices for specific microscopes.
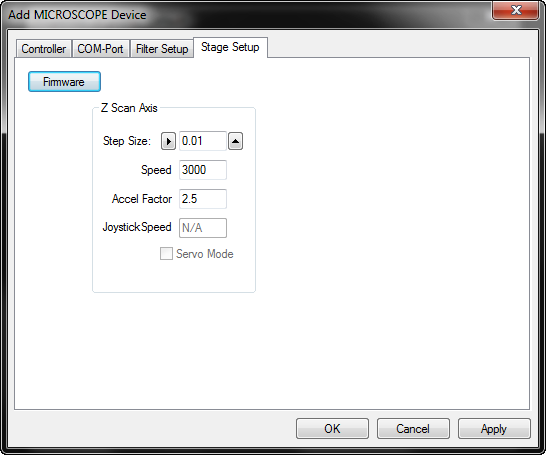
The Stage Setup page allows the physically installed stage actuators to be configured for software control. There may be X-Y, Z or both stage axes listed in this display, where each can be configured with an interface such as that discussed under Stage Device Controller Properties.

Note: If the microscope being configured does not have stage control available, or if this option was not checked on its Controller-selection tab, the Stage Setup tab should not be visible.
Once I/O communication has been configured in the Profile, press Apply to verify your device in the Apply Microscope Dialog. You may wish to verify your device as a whole or you may wish to verify the individual units. If you click Apply while on the COM port page, the installed microscope's interactive testing dialog will be identical to the Microscope Pane available on the Device Tab. If you click Apply while on the Stage Tab, HCImage will perform Stage Testing. Pressing Apply while on the Filter Tab will initiate Filter Testing. Select Apply on the Shutter Tab to initiate Shutter Testing.
The microscope controls are customized to correspond to features each manufacturer has included in their motorized microscopes. For detailed help, consult the microscope's control manual.